In this post, Chuck Shive with Chips & Tips explains how to use your offline tool measuring device in a few easy steps.
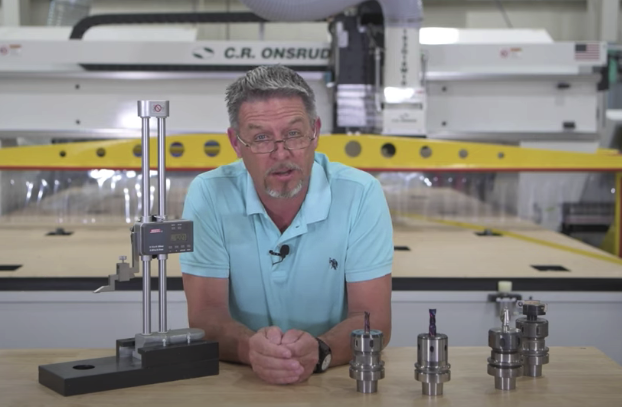
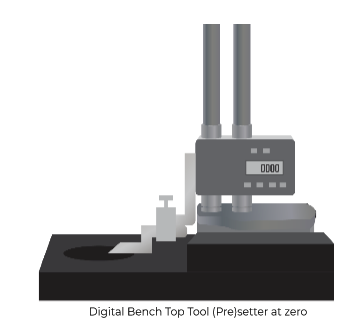
Turn on a Digital Bench Top Tool (Pre)setter (sold separately).
Note: Make sure all router bits are placed in collets and locked down in the Tool Holder.
1. Bring the indicator to the top face of the base. Tighten the thumbscrews and ready the device by pressing the ZERO/ABS button to reset it back to zero. Be sure it’s set to zero. This will ensure an accurate measurement of your tools, which are measured from the gauge line of your tool holder to the tip of your router bits.
2. Bring the indicator up and away from the base of the device, ensuring that there is enough room to place the Tool Holder under the indicator tip.
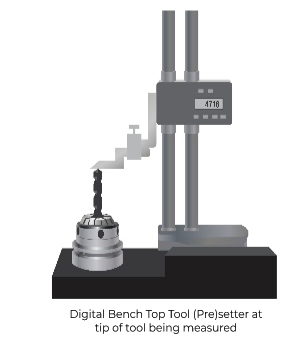
3. Place the Tool Holder that needs to be measured into the device, and bring the indicator (stylus) back down to the tip of the tool. You may need to loosen the thumbscrews to bring the device forward. Adjust the position until the indicator touches the bit at the correct position (i.e., the tip). Tighten the thumbscrews again and measure. Verify this number by checking it more than once. This is the number you’ll enter into your machine to indicate your tool length. Record this value and also note in what Tool Tray slot position the tool will be placed. Repeat this process for each tool in the Tool Tray.
If you don’t have an offline measuring device, we encourage you to think about getting one for your shop. To order, or if you have other tooling questions, just give our tooling department a call at: 704-508-7000, reach out via email: parts@cronsrud.com, or visit our tooling website: https://www.cronsrud.com/store/index.php
Or, if you’re struggling with any production issues and would like to see if we have a solution for you, please give C.R. Onsrud a call at: 704-508-7000 or reach out via email: info@cronsrud.com. We are happy to help you any way we can.